> ## Documentation Index
> Fetch the complete documentation index at: https://docs.uniblock.dev/llms.txt
> Use this file to discover all available pages before exploring further.
# Uniblock Quickstart Guide
> Quickstart guide to Uniblock! Learn how to create an Uniblock project, make your first request with our providers, create an API key, and setup up Uniblock as your client.
# 👋 Getting Started
New to Uniblock? Get access for free through our [dashboard](https://dashboard.uniblock.dev/)
Estimated time to complete this guide: \< 10 minutes
## 📋 Steps to get started with Uniblock
This guide assumes you already have an Uniblock account and access to our Dashboard.
1. 🦄 Create an Uniblock Project
2. ✍️ Make a request
3. 🔑 Get your Project API Key
4. 🤝 Set up Uniblock as your client
5. 💻 Start building!
## 1. Create an Uniblock Project 🦄
To use Uniblock's products, you need a project to authenticate your requests.
You can create a project from the dashboard. Follow the steps below to create a project:
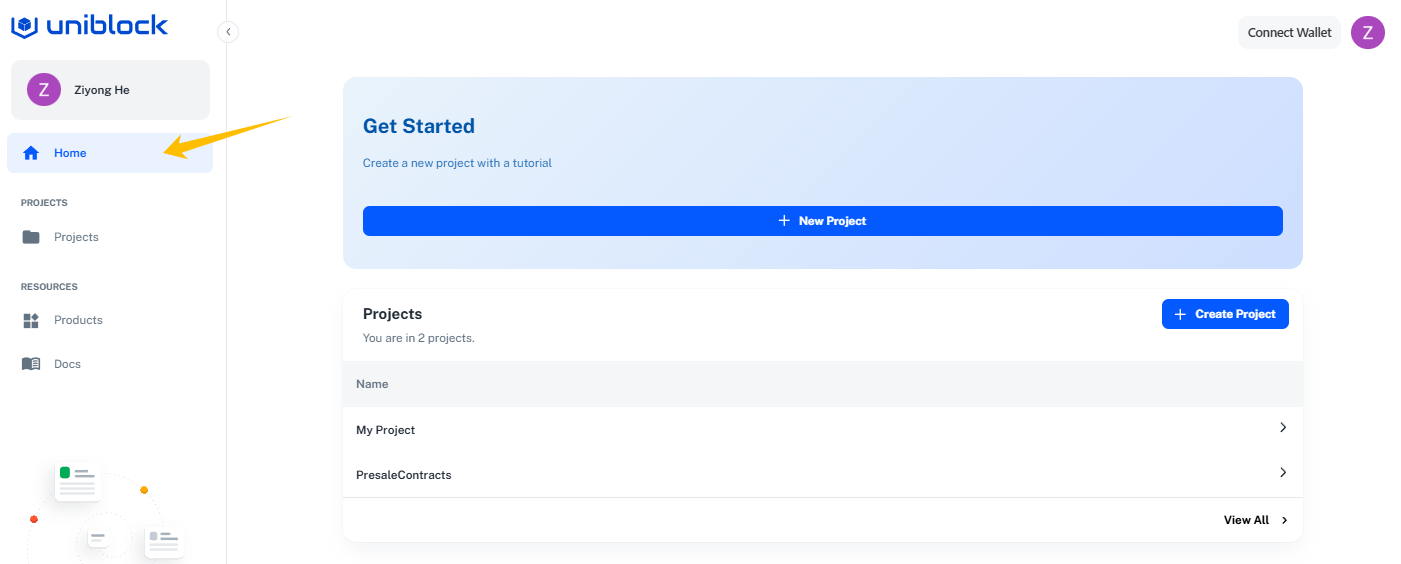
1. First, navigate to your Uniblock's dashboard and click on the `Home` tab.
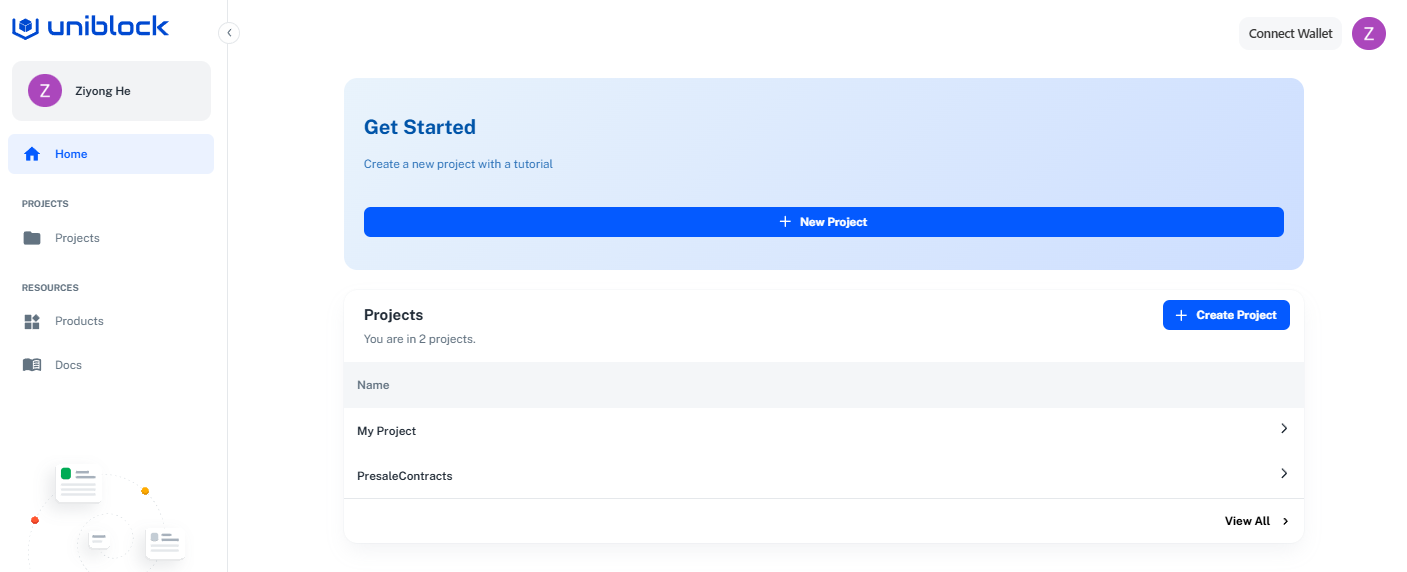
 2. Next click on the create a project button in the Get Started section.
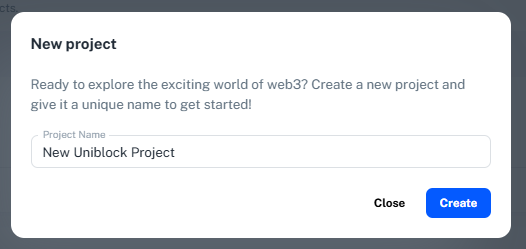
 3. Enter in a new project name and then click on `create`.
 ## 2. Make a request ✍️
Nice! You've made your project. Next you can interact with Uniblock's providers and also make a call to our endpoints.
1. Following from before, you can click on your project. To bring you to your project dashboard.
## 2. Make a request ✍️
Nice! You've made your project. Next you can interact with Uniblock's providers and also make a call to our endpoints.
1. Following from before, you can click on your project. To bring you to your project dashboard.
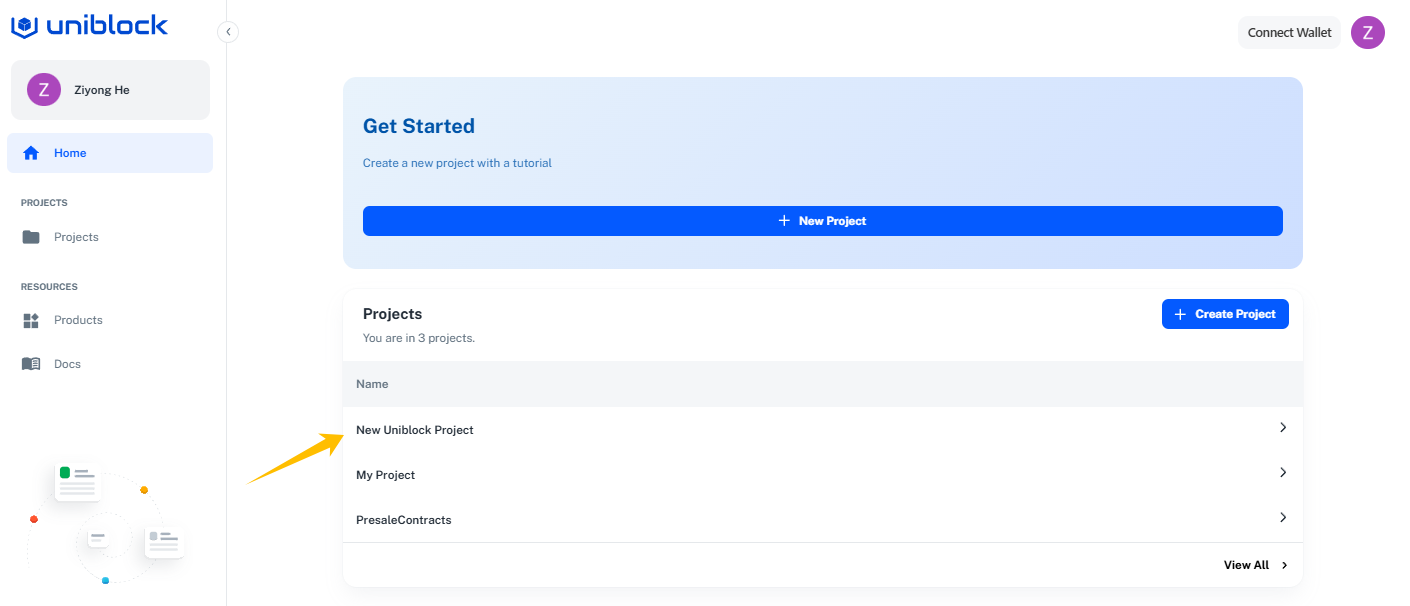 2. You will be present with your project home page like the following.
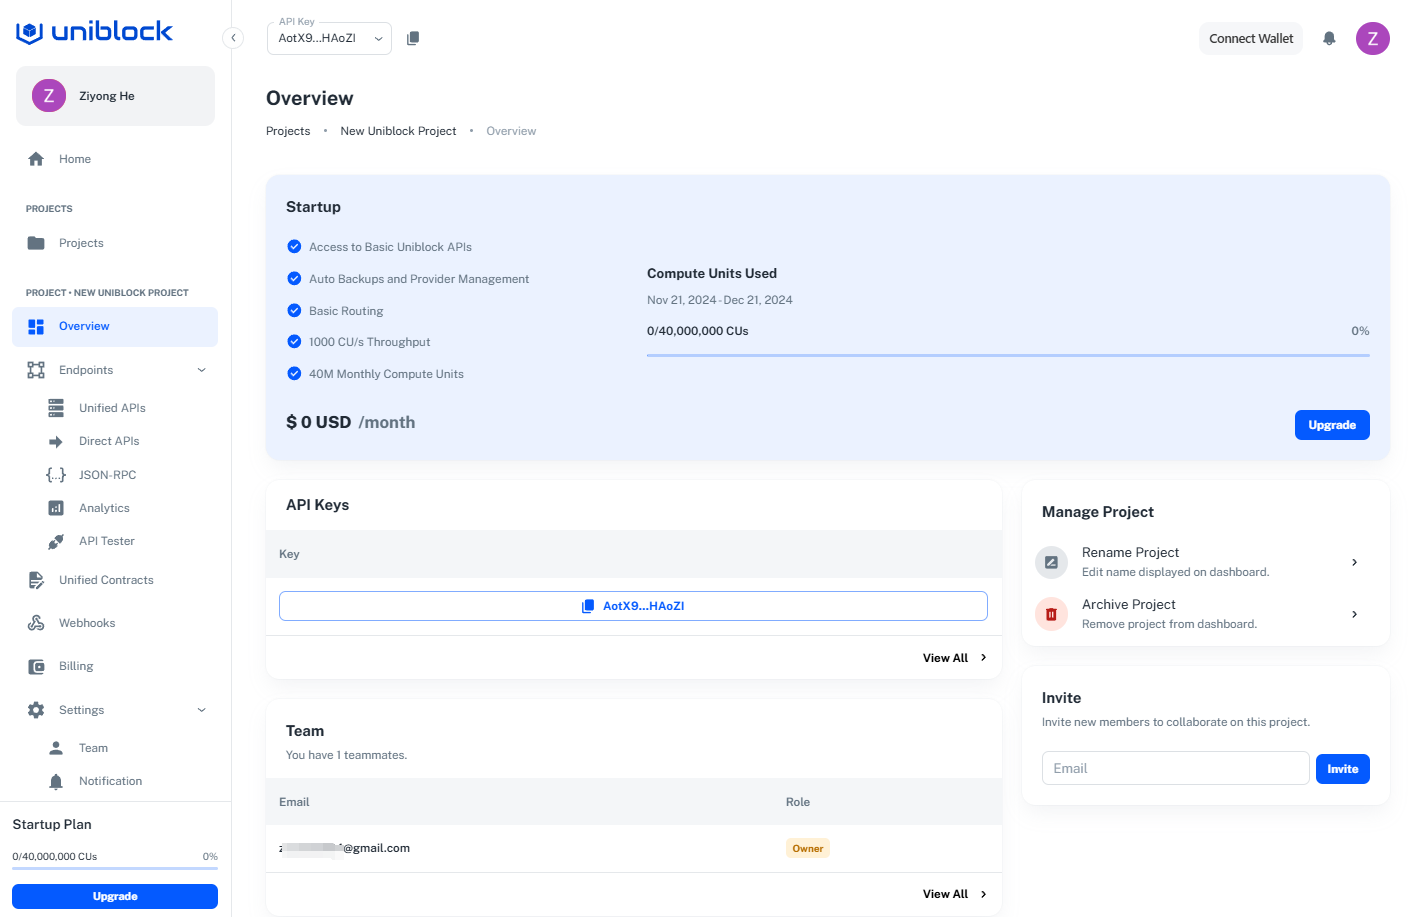 3. There are lots of things you can explore around and find out about but to call our endpoint you can click on the `Endpoints` -> `API Tester` section on the left nav-bar.
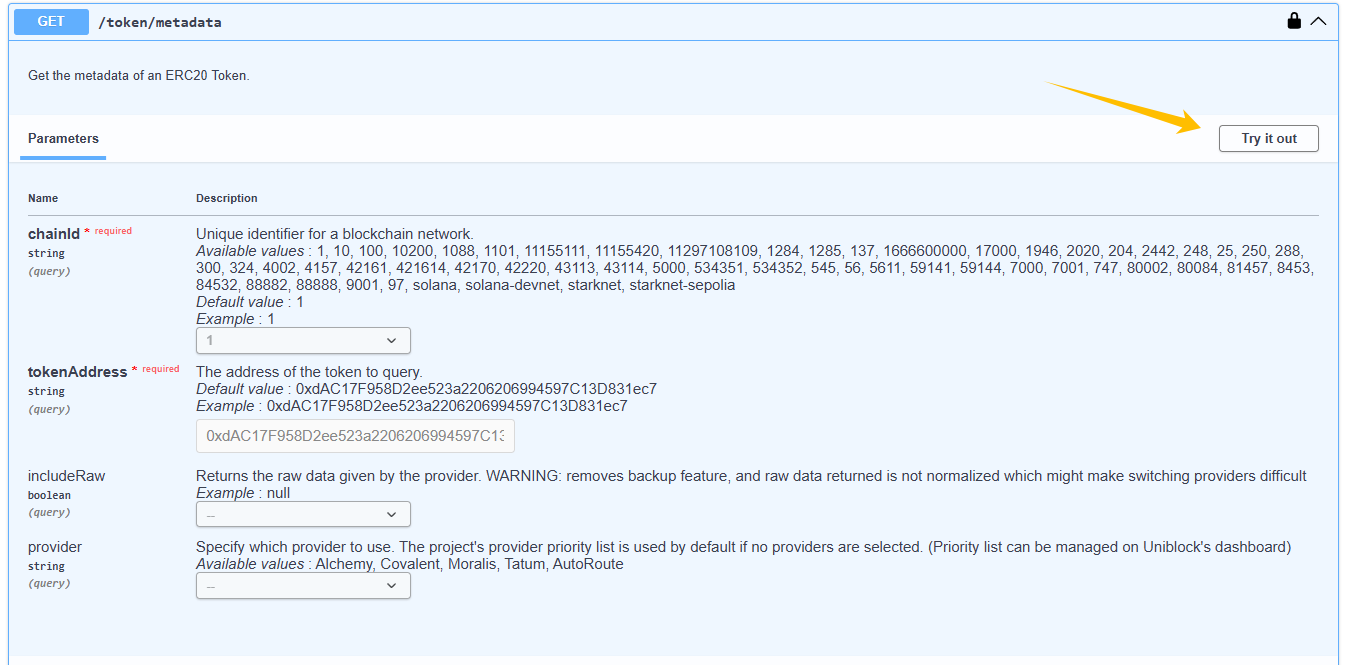
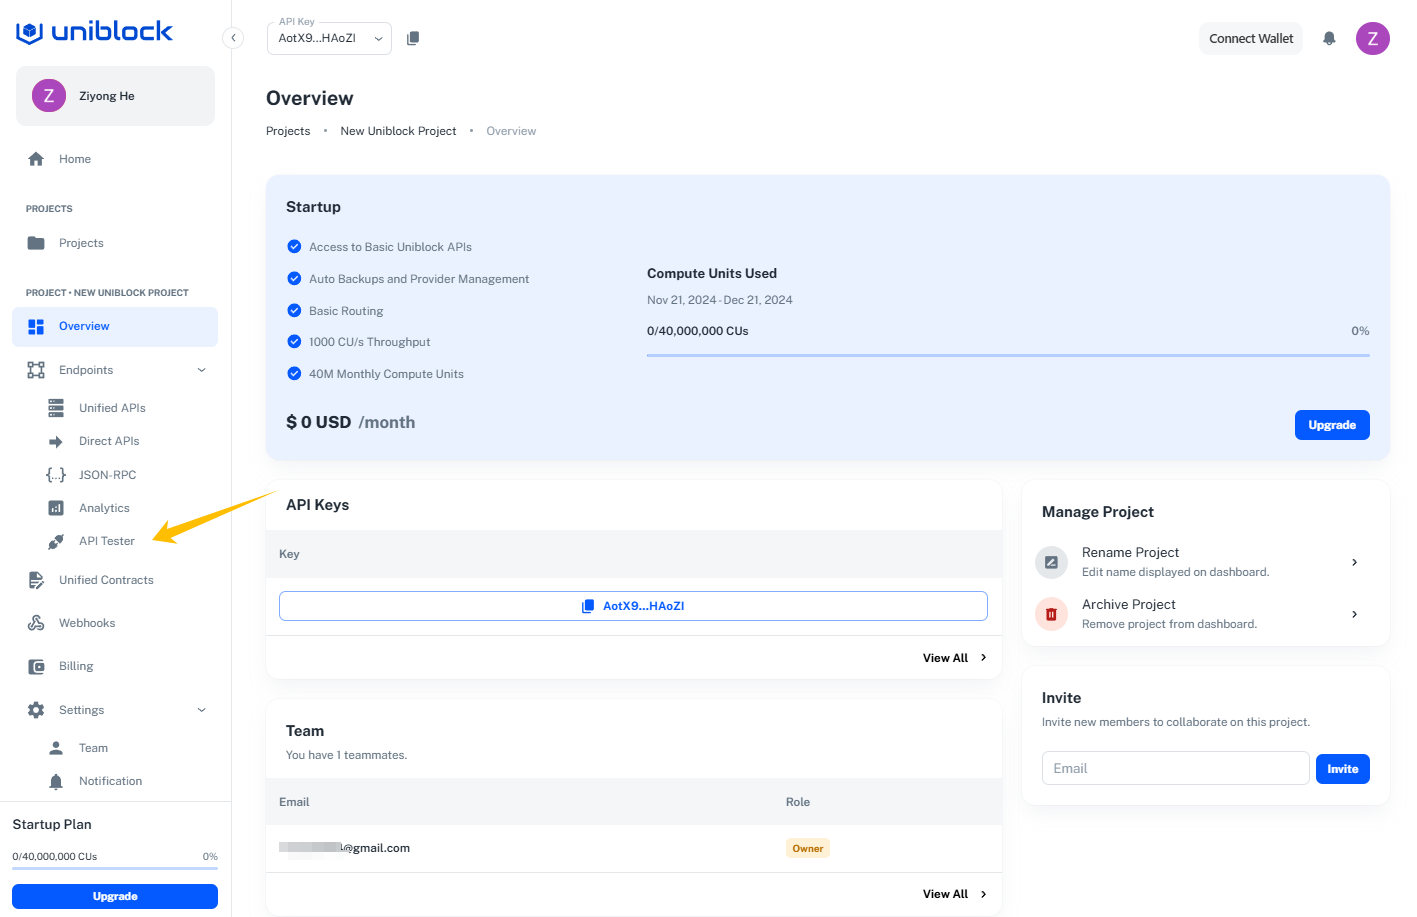 4. A new tab will open to show the explorer where you can select an endpoint you like and try calling the endpoint. We will go with the `/token/metadata` endpoint.

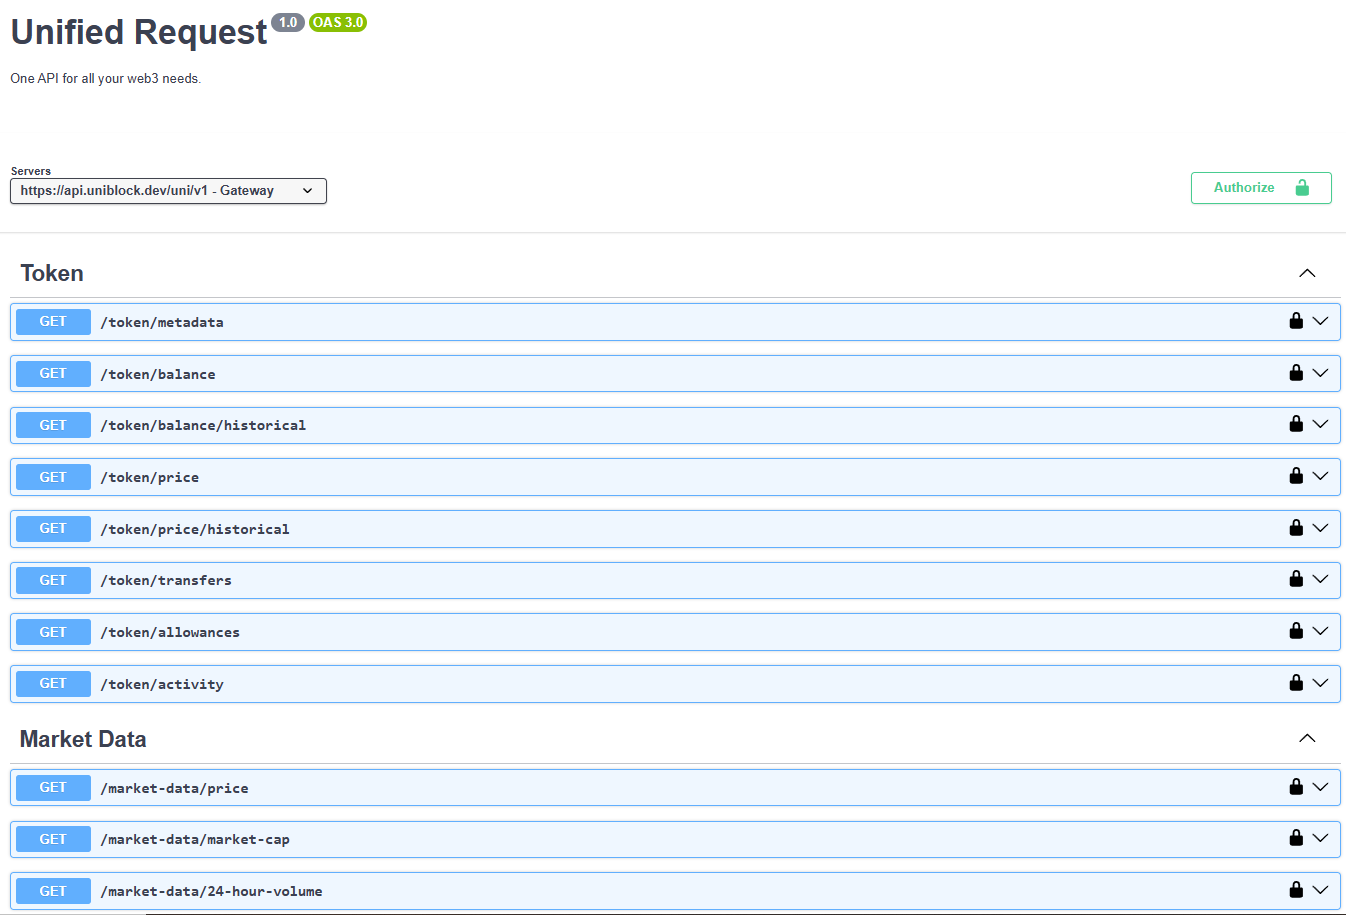 5. You will see the details about this endpoint.
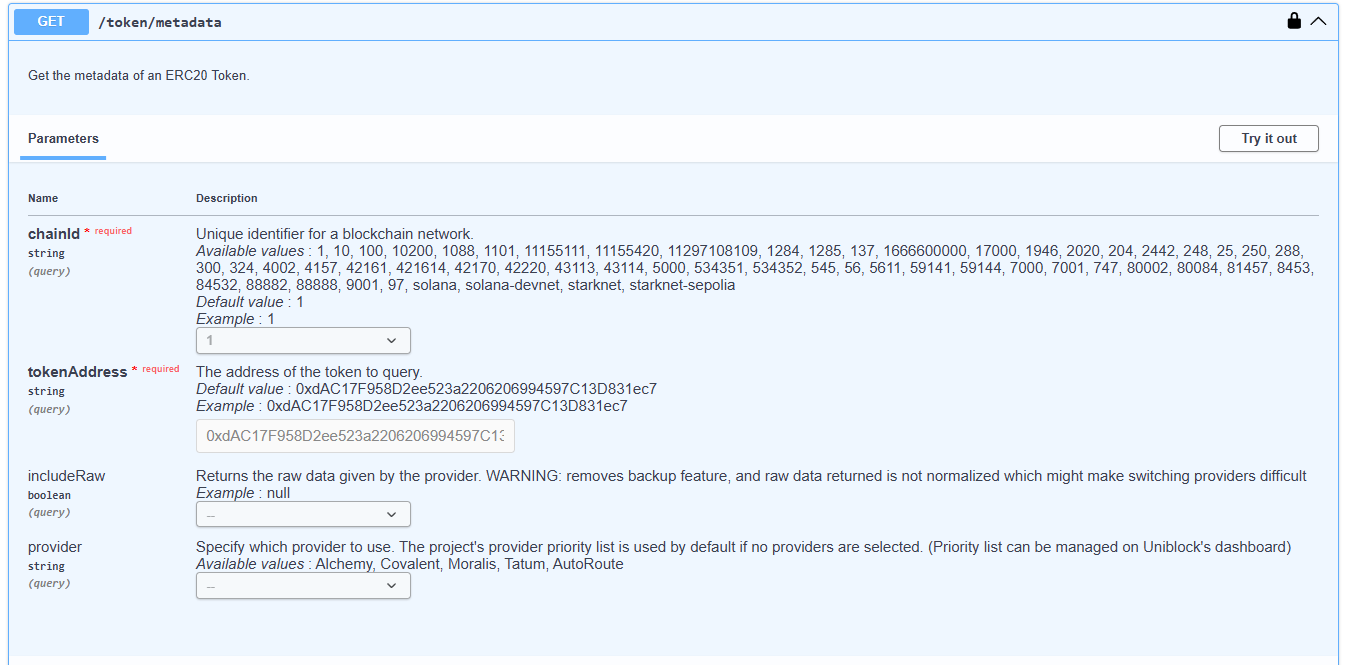 6. Now we try to call this endpoint, by clicking the "Try it out" button.
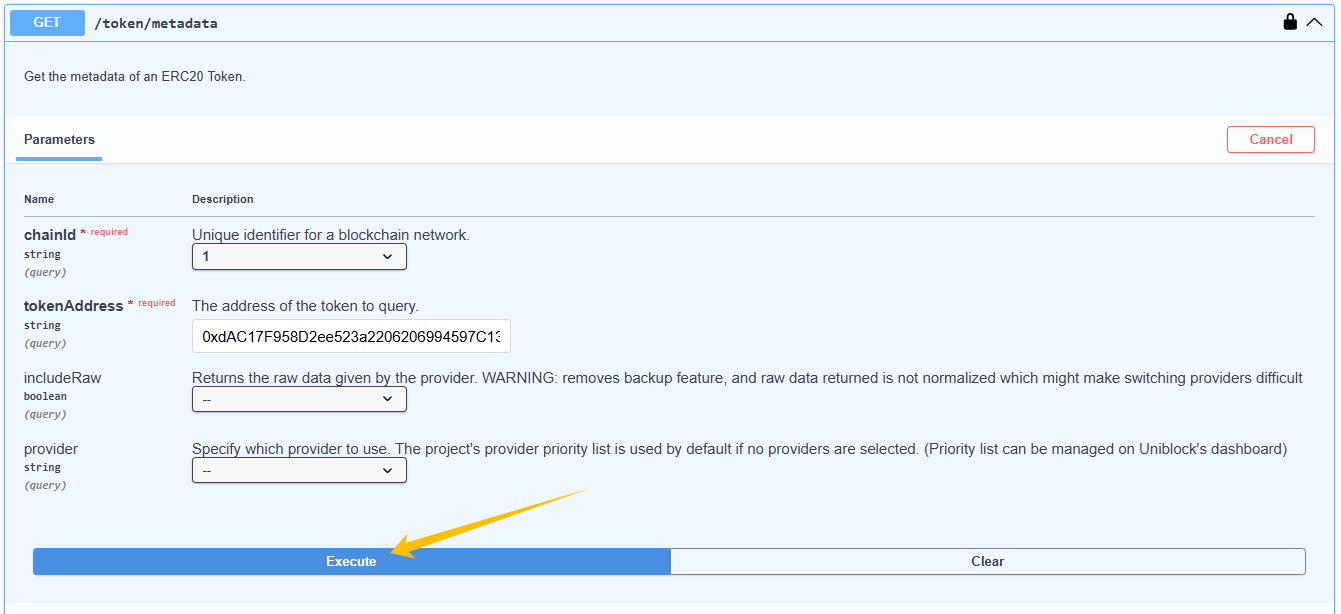
 7. Click "Execute" button to send a request with the provided example parameters.
 8. Here is the successful response with 200 status code.
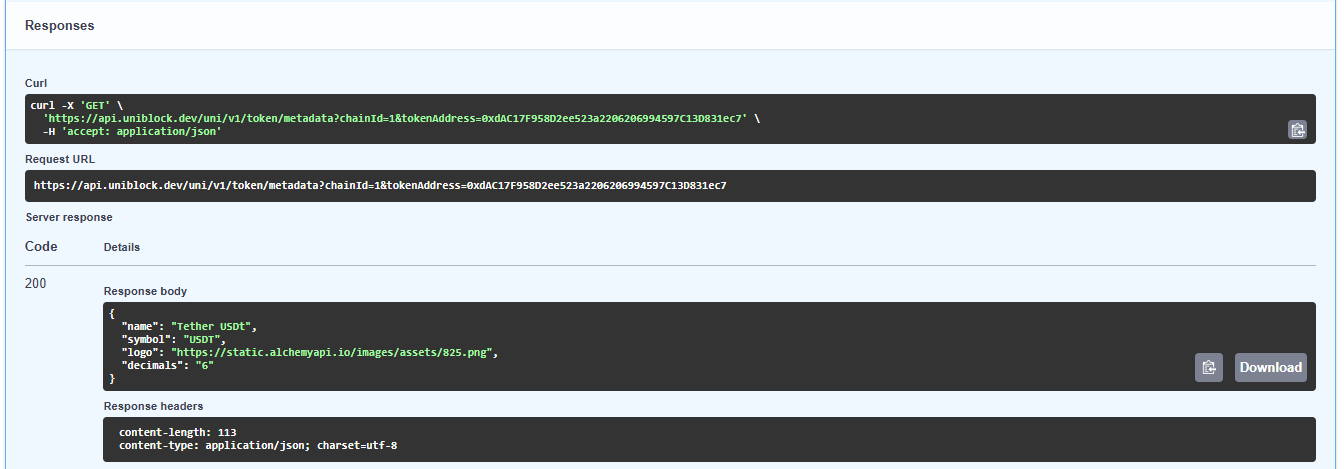 9. Nice job! You've made your first call with Uniblock! 🎉
## 3. Get your Project API Key 🔑
You also can test calling the endpoint using your own API.
1. After you've created your project, you will find your API key on the `Overview` page.
9. Nice job! You've made your first call with Uniblock! 🎉
## 3. Get your Project API Key 🔑
You also can test calling the endpoint using your own API.
1. After you've created your project, you will find your API key on the `Overview` page.
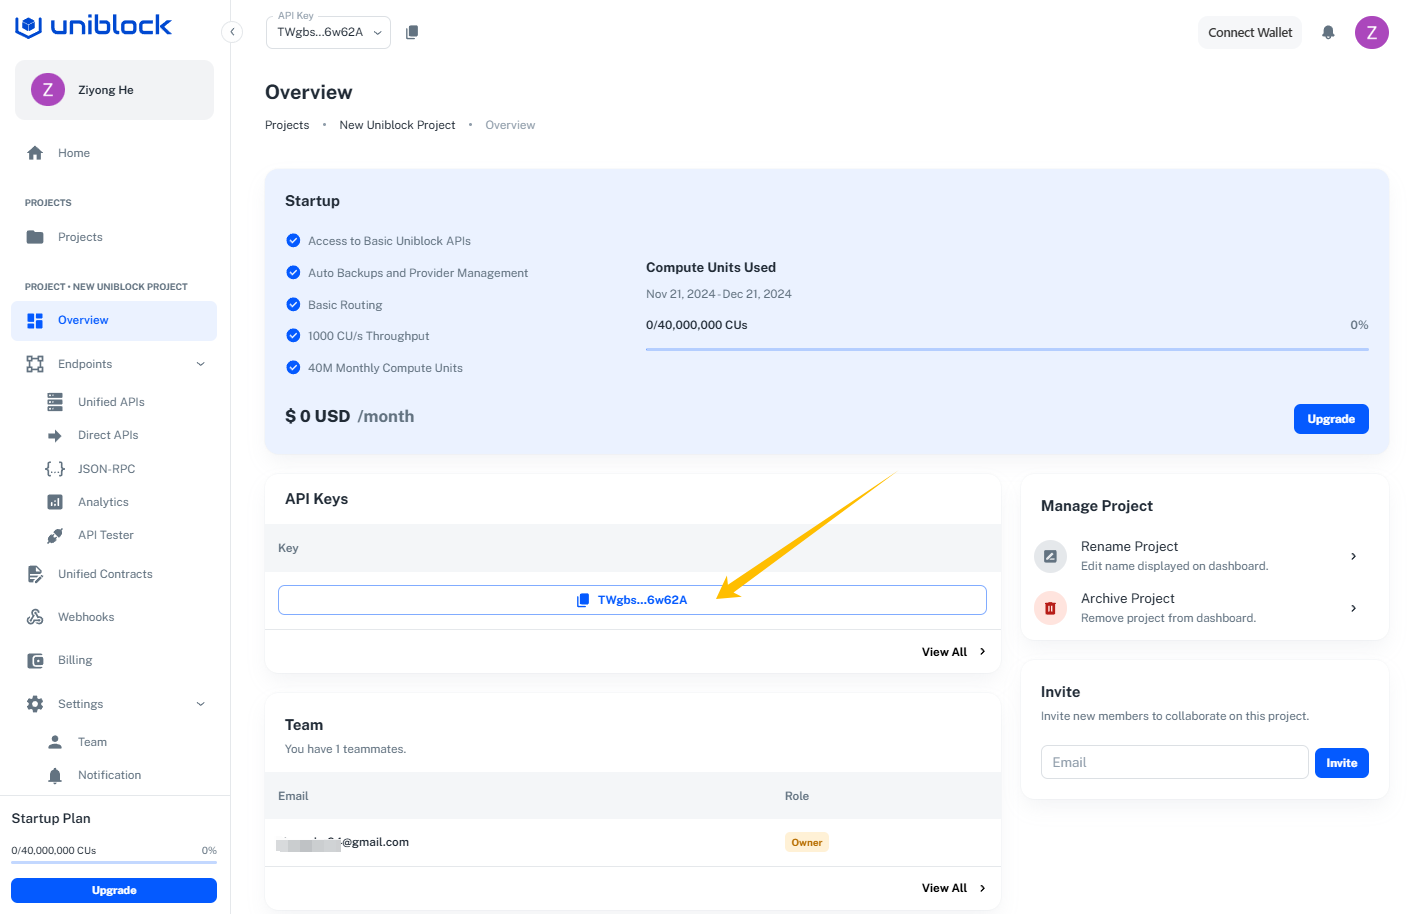 2. Add the key to the `Explorer`.
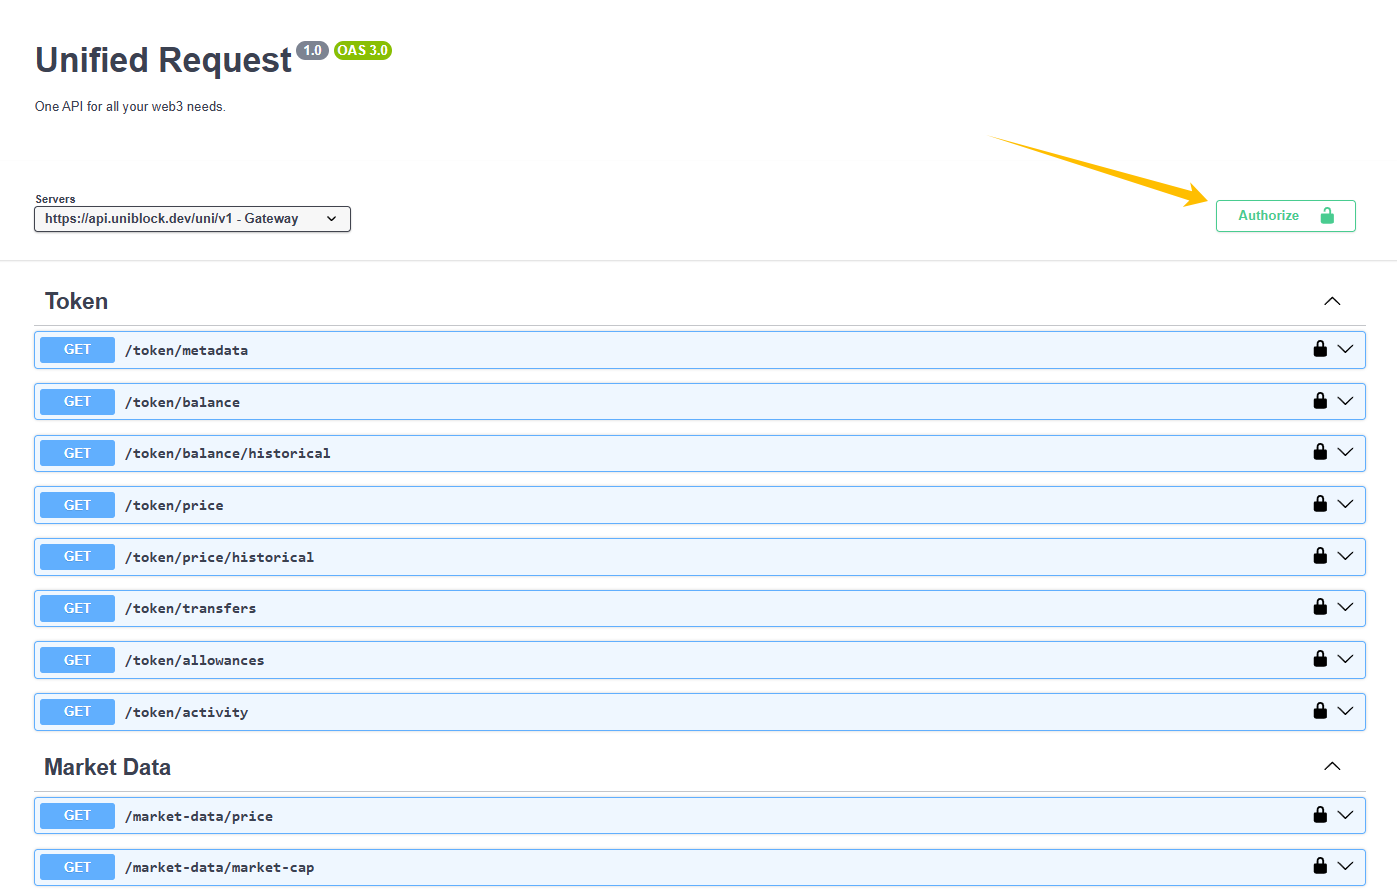
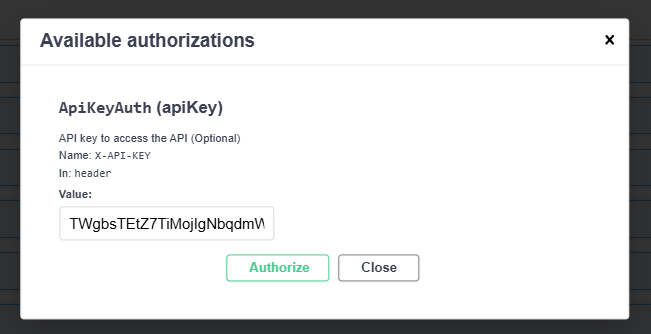
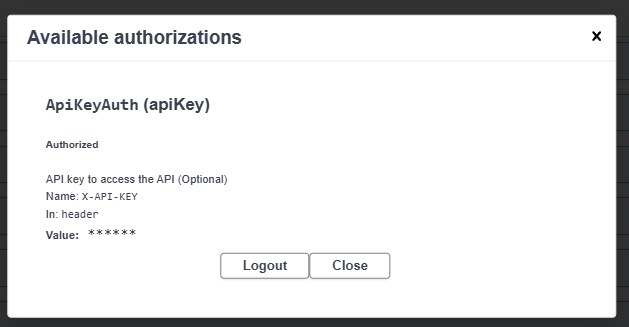 3. Now you are logged in with your API key. The data from the requests made using this key will be collected and displayed in the project metrics.
## 4. Setup Uniblock as your Client 🤝
Want to integrate Uniblock into your production app?
Find out how to set up or switch your current provider to Uniblock by using node js. An easy way to interact and use us.
1. From your command line, create a new project directory.
With Yarn:
````bash bash mkdir your-project-name cd your-project-name yarn init # (or yarn theme={null}
init --yes) ```
With NPM:
```bash bash mkdir your-project-name cd your-project-name npm init # (or npm
init --yes) ```
2. Create a file named index.js and add the following contents:
### You should replace demo with your Uniblock's Project API key.
index.js
```bash bash
const options = {
method: 'GET',
headers: {
accept: 'application/json',
'X-API-KEY': 'demo-api-key'
}
};
fetch('https://api.uniblock.dev/uni/v1/token/balance?chainId=1&walletAddress=0x3f5ce5fbfe3e9af3971dd833d26ba9b5c936f0be', options)
.then(response => response.json())
.then(response => console.log(response))
.catch(err => console.error(err));
````
3. Run it using node
```bash bash theme={null}
node index.js
```
4. You should now see the latest token/balance output in your console!
```bash bash theme={null}
{
"balances": [
{
"contractAddress": "0x0000000000095413afc295d19edeb1ad7b71c952",
"balance": "100000000000000000000"
},
{
"contractAddress": "0x0000000035f26e72b70552b92bf7e02f67a90549",
"balance": "20000000000000000000000000"
},
{
"contractAddress": "0x00000006e55a9364b657e3b91cd0411b4fd11ac2",
"balance": "20082049953158728210968860"
},
...
],
"cursor": "ALC_0x09a3ecafa817268f77be1283176b946c4ff2e608"
}
```
Woo! Congrats! You just wrote your first web3 script using Uniblock and sent your first request to your Uniblock API endpoint 🎉
The app associated with your API key will also have more details about your endpoint call.
### Analytics & Logs:
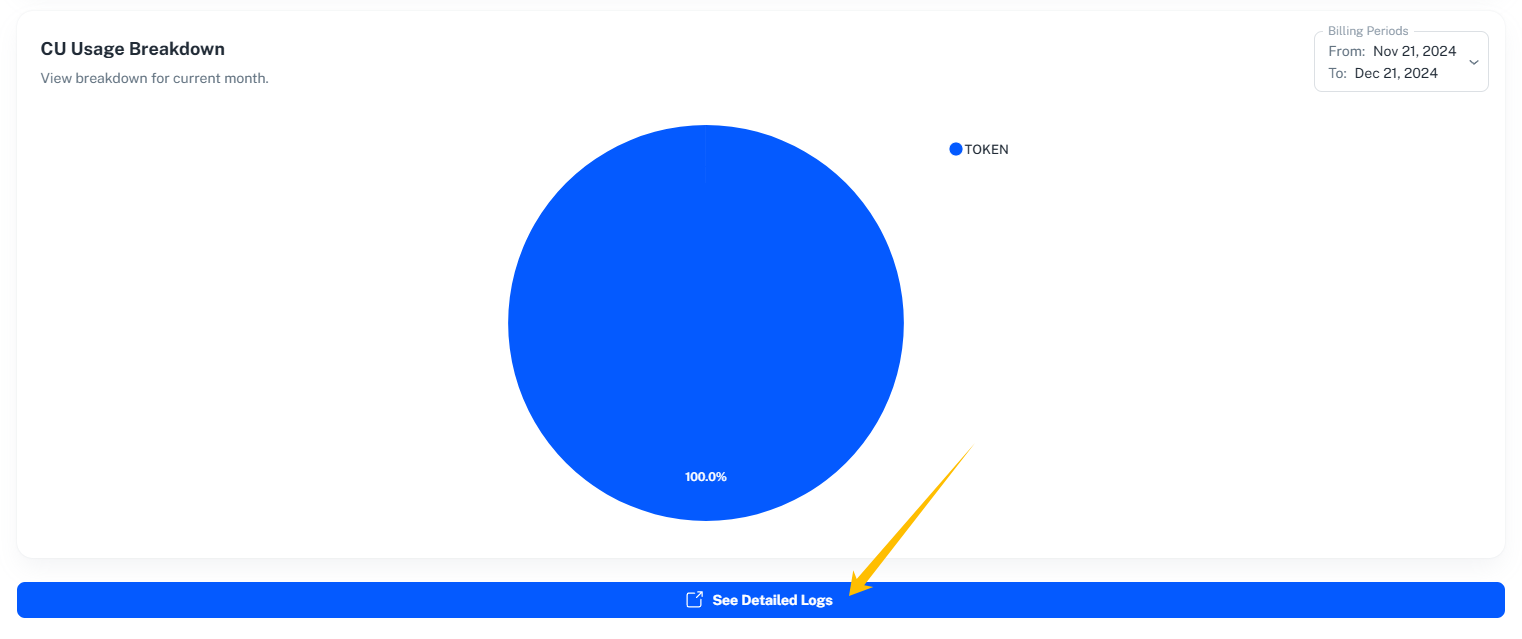
1. After executing an API call, head over to your project and click on the **Analytics** section.
3. Now you are logged in with your API key. The data from the requests made using this key will be collected and displayed in the project metrics.
## 4. Setup Uniblock as your Client 🤝
Want to integrate Uniblock into your production app?
Find out how to set up or switch your current provider to Uniblock by using node js. An easy way to interact and use us.
1. From your command line, create a new project directory.
With Yarn:
````bash bash mkdir your-project-name cd your-project-name yarn init # (or yarn theme={null}
init --yes) ```
With NPM:
```bash bash mkdir your-project-name cd your-project-name npm init # (or npm
init --yes) ```
2. Create a file named index.js and add the following contents:
### You should replace demo with your Uniblock's Project API key.
index.js
```bash bash
const options = {
method: 'GET',
headers: {
accept: 'application/json',
'X-API-KEY': 'demo-api-key'
}
};
fetch('https://api.uniblock.dev/uni/v1/token/balance?chainId=1&walletAddress=0x3f5ce5fbfe3e9af3971dd833d26ba9b5c936f0be', options)
.then(response => response.json())
.then(response => console.log(response))
.catch(err => console.error(err));
````
3. Run it using node
```bash bash theme={null}
node index.js
```
4. You should now see the latest token/balance output in your console!
```bash bash theme={null}
{
"balances": [
{
"contractAddress": "0x0000000000095413afc295d19edeb1ad7b71c952",
"balance": "100000000000000000000"
},
{
"contractAddress": "0x0000000035f26e72b70552b92bf7e02f67a90549",
"balance": "20000000000000000000000000"
},
{
"contractAddress": "0x00000006e55a9364b657e3b91cd0411b4fd11ac2",
"balance": "20082049953158728210968860"
},
...
],
"cursor": "ALC_0x09a3ecafa817268f77be1283176b946c4ff2e608"
}
```
Woo! Congrats! You just wrote your first web3 script using Uniblock and sent your first request to your Uniblock API endpoint 🎉
The app associated with your API key will also have more details about your endpoint call.
### Analytics & Logs:
1. After executing an API call, head over to your project and click on the **Analytics** section.
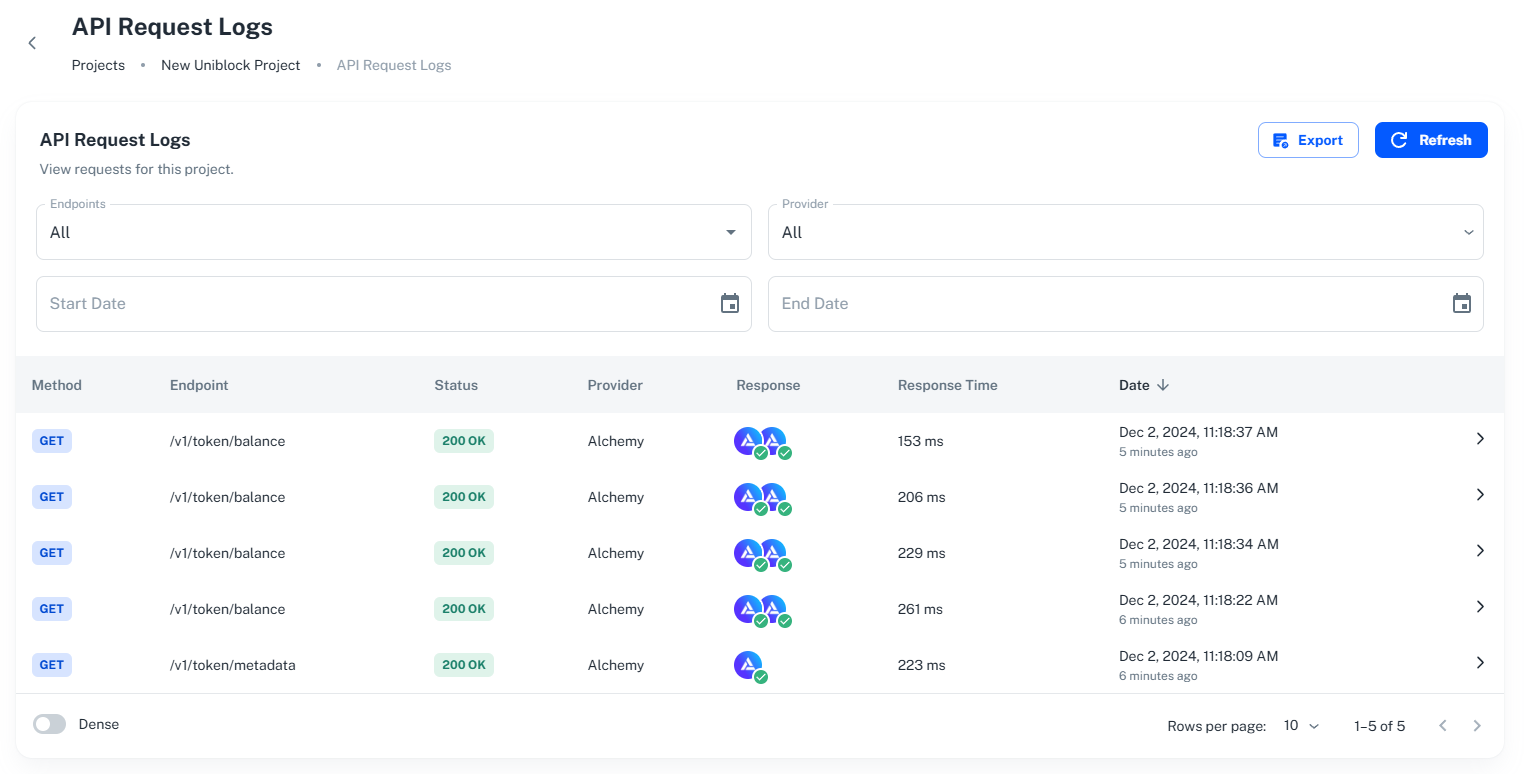
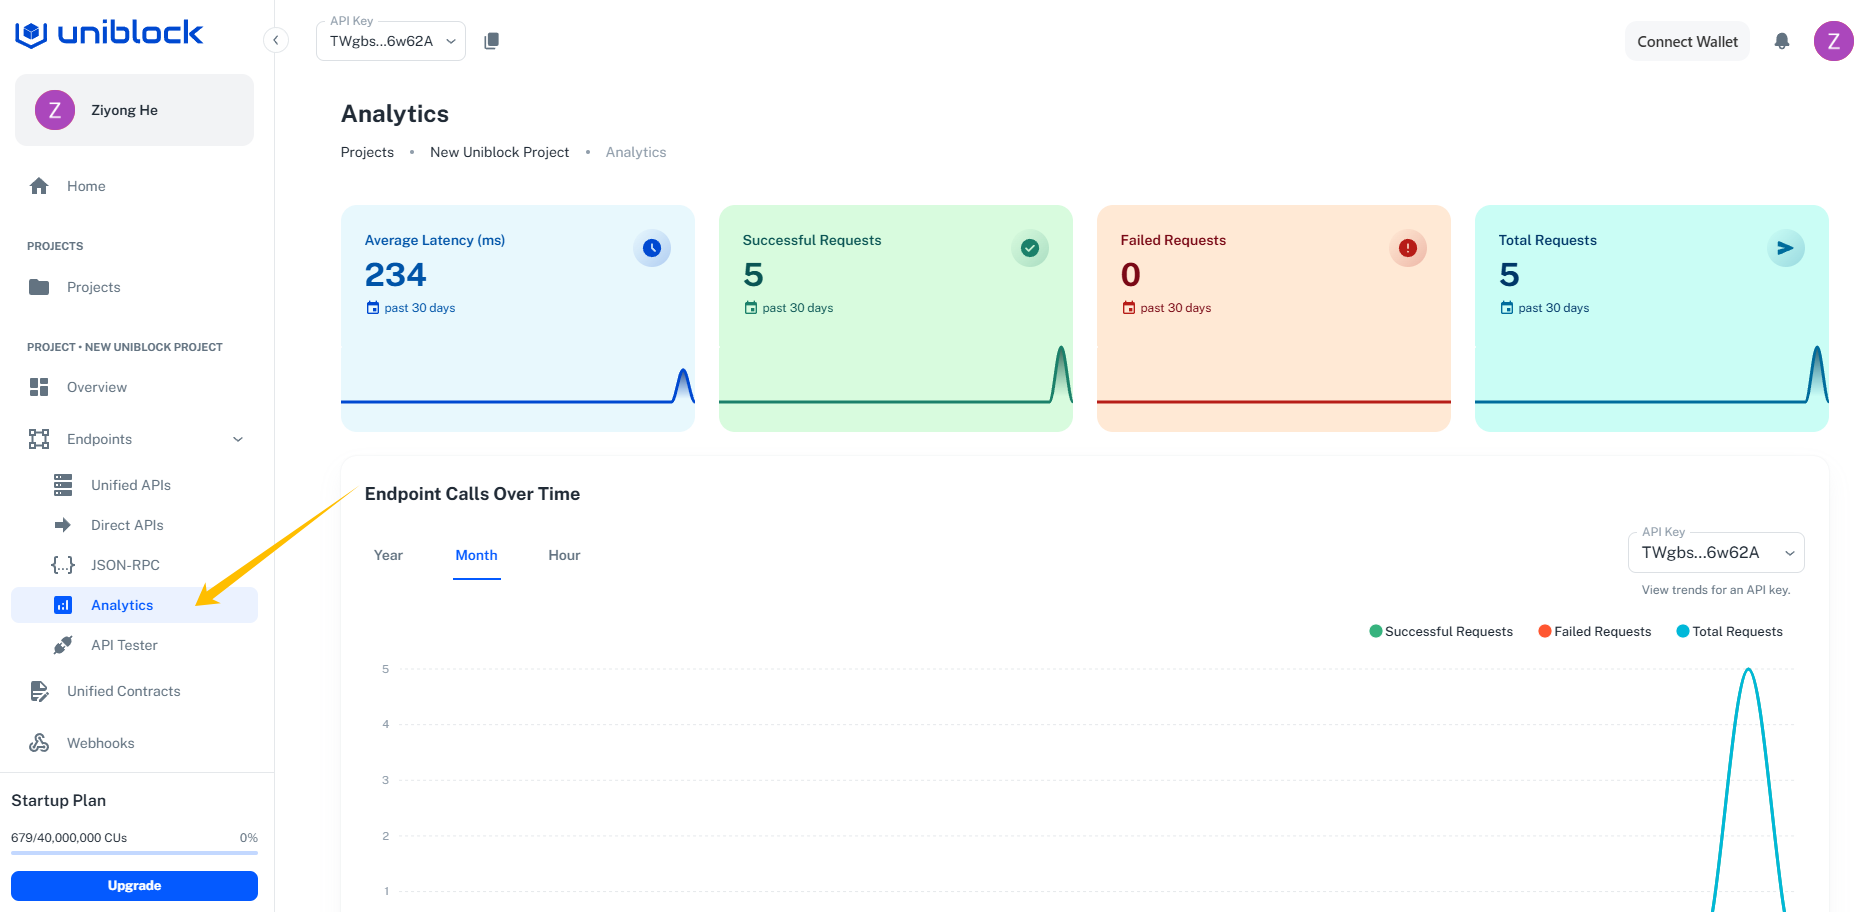 2. Here, scroll down to **See Detailed Logs** to delve deeper into each call's specifics.
 3. View detailed information for each call, such as request type, timestamp, response time, headers, and much more.
 ### Congratulations! 🎉
You've now successfully set up and utilized Uniblock for your project.
***
[Overview](/reference/unified-api/overview-unified-apis)
***
Create your free account and start building with unified blockchain infrastructure across 100+ chains.
Explore all available endpoints and interactive playgrounds
Get help from our team and connect with other developers
### Congratulations! 🎉
You've now successfully set up and utilized Uniblock for your project.
***
[Overview](/reference/unified-api/overview-unified-apis)
***
Create your free account and start building with unified blockchain infrastructure across 100+ chains.
Explore all available endpoints and interactive playgrounds
Get help from our team and connect with other developers